
3 Reliable Escapes to Defend Against a Grab From Behind

If someone grabs you from behind, your first move is simple: drop your weight, turn into the grab to break their control, and drive toward the nearest exit. That single sequence, weight drop, rotation, exit, works across nearly every rear-grab scenario, whether it’s a bear hug, a waist grab, or a hand on your shoulder.
Here’s your one-minute checklist for the first ten seconds:
Breathe and drop. Exhale hard, bend your knees, and sink your hips to make yourself harder to lift.
Turn and strike. Rotate toward the attacker’s arm and deliver an elbow, stomp, or palm strike to create space.
Clear and go. Break the grip, get your hands up, and move immediately toward people or an open path.
“Controlled breathing and rehearsal turn a technique you learned in class into something your body does automatically under stress,” according to research on rear-grab responses.
Pro Tip: Practice the drop-turn-strike sequence slowly, ten times, before you ever add speed. Your body needs the pattern before it needs the power.
One safety note before anything else: your goal is to get away, not to win a fight. If you can create distance and run, run. Save strikes for moments when escape isn’t possible, and never assume a technique guarantees a clean outcome, some rely on pain compliance that an attacker under adrenaline or substances may not feel.
Key Takeaways
Defending against a grab from behind comes down to three repeatable actions: drop your weight, rotate to break the attacker’s structure, and clear the grip using leverage rather than strength.
Point | Details |
Drop your weight first | Bending your knees and sinking your hips makes you harder to lift or drag in the first two seconds. |
Identify the grab type | Bear hug, waist grip, and shoulder grab each call for a different escape sequence, so assess before reacting. |
Target wrists and thumbs | Leverage against the thumb side of a grip breaks it with far less force than fighting the whole hand. |
Escape beats confrontation | Once the grip breaks, run toward people or an exit rather than continuing to engage. |
Train with CVPSD | CVPSD’s in-person workshops provide supervised drilling and pressure testing that solo practice can’t replicate. |
Table of Contents
How Do You Defend Against a Grab From Behind in the First 10 Seconds?
The first ten seconds decide almost everything. Your body wants to freeze or flail, neither helps. What actually works is a timed sequence you can rehearse until it’s boring.
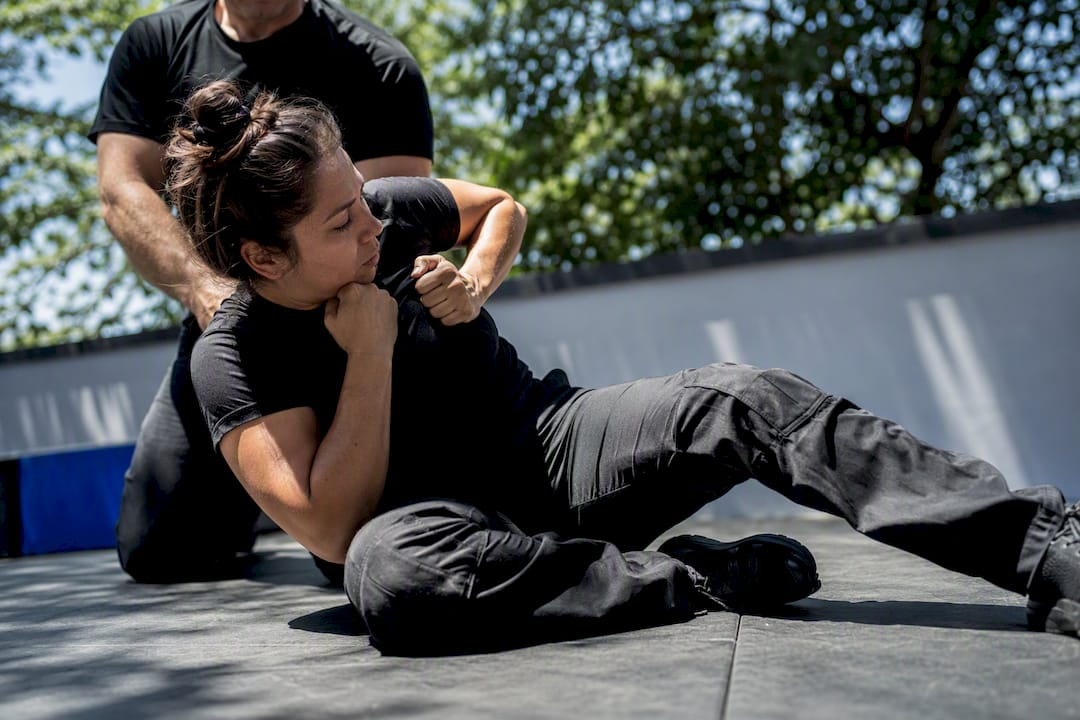
0 to 2 seconds: Take one sharp exhale to override the startle reflex. Tuck your chin toward your chest to protect your throat and jaw. Bend your knees and sink your hips, a lower center of gravity makes you dramatically harder to lift or drag.
2 to 5 seconds: Feel for the attacker’s arm position and pivot your hips toward it. Stepping and turning into the grab, rather than away from it, exposes their wrist and unbalances their stance. If you can’t reach a wrist cleanly, go straight to a shock move: stomp the instep, drive an elbow back into the ribs, or throw a hammer-fist into the groin.
5 to 10 seconds: Use leverage, not muscle, to clear the grip. Pull down and rotate against the thumb line of their grip, the weakest point of any hold, then sprint toward light, noise, or people. Lowering your center of gravity and rotating to change the attacker’s angle is the mechanic behind nearly every rear-grab escape that works.
Shout something specific like “Call 911” or “Stop touching me,” a generic scream draws less help than a clear command.
Scan for your exit before you finish the escape, not after.
Never pause to assess damage or confront the attacker once you’re free.
Pro Tip: Vocalizing while you move does two things at once: it recruits bystanders and it forces you to keep breathing instead of holding your breath through the panic.
Escaping a Rear Bear Hug: Arms Free vs. Arms Trapped
A rear bear hug comes in two forms, and knowing which one you’re in changes your entire response. A high or chest grip wraps around your shoulders and usually leaves your forearms free to move. A low or waist grip locks around your hips, controlling your base and often trapping your arms against your sides. Confusing the two wastes precious seconds.
If your arms are free
Drop your weight immediately by bending your knees, this makes you heavier and harder to lift off the ground.
Rotate your hips sharply to one side while shooting both forearms forward and down, breaking the horizontal squeeze of the hug.
Fire a rear elbow strike into the ribs or solar plexus as you turn.
Once you feel the grip loosen, pivot fully to face the attacker and grab their nearest wrist.
Step back and out at an angle, keeping their arm extended so they can’t re-grab you.
If your arms are trapped
Drop your weight hard and tuck your chin, this alone often loosens a grip built around your ribs.
Deliver a heel stomp to the instep or a backward head movement is risky, so favor a groin strike with your hips if your hands are pinned.
As the grip shifts, bridge your torso and rotate to free one shoulder and arm.
Once one arm is free, reach back, secure the attacker’s wrist, and drive your elbow up while pulling their wrist down. This lever-based method breaks the grip without relying on strength, and site-reported drill results describe it as effective when the sequence is practiced correctly.
Step forward immediately to put distance between you and the attacker before they can reset.
If you’re significantly smaller than the person grabbing you, timing matters more than force. A well-placed elbow the instant the grip tightens does more than a delayed, telegraphed strike. Community-sourced martial arts guidance also points to breathing to expand your torso and dropping your weight as a way to loosen a hug before you ever throw a strike, though the same source cautions that pain-compliance moves aren’t guaranteed to work on every attacker.
Pro Tip: Never practice throws or takedowns on a partner without supervised instruction. A botched throw can injure you both, save that progression for a trained instructor.
What’s the Best Way to Break a Waist or Chest Grab?
Whether the grip lands high across your chest or low around your waist changes where your leverage comes from. A high grip limits your rotation but leaves your hips freer. A low grip pins your hips but usually leaves your upper body more mobile. Identify which one you’re dealing with before you commit to a technique.
The core sequence stays the same either way:
Drop your hips slightly and pivot your body toward the point where the attacker’s arms connect, this is the strongest angle for breaking their structure.
Reach back and grab their wrist with both hands if possible.
Drive your elbow upward while simultaneously pulling their wrist downward, this creates a shearing motion that overcomes even a strong grip without matching their strength.
Once the grip breaks, step forward and away rather than backward into their body.
Three mistakes undercut this escape every time. Pulling straight back against the grip just pits your strength against theirs, and you’ll usually lose that contest. Flailing your arms wastes energy and telegraphs your next move. Staying upright and tall keeps your center of gravity high, making you easier to control or lift. Correct each by dropping your hips first, moving with intention rather than panic, and always pivoting rather than pulling.
Pro Tip: Target the thumb side of the attacker’s grip, not the palm. The thumb is the weakest point of any grasp, and pressure there breaks the hold with far less force than fighting the whole hand.
What to Do When Someone Grabs Your Shoulder or Neck From Behind
A hand on your shoulder, collar, or neck demands a faster, more careful response because your airway is at risk. Your first move, before anything else, is to tuck your chin and bring both hands up to protect your throat. Lower your base at the same time to reduce how easily you can be pulled off balance.
From there, you have two paths depending on what you feel:
Trap and turn: If the grip is on your shoulder or collar, capture the attacker’s wrist with your near hand and pivot your body into them, breaking their angle and facing them.
Shock and disengage: If the hand is closing around your neck, a stomp to the instep, an ear rake, or a hammer-fist to the groin creates the split-second opening you need to duck free.
Not every hand on your shoulder is an attack. If the contact could plausibly be a mistaken tap, a friend, or someone trying to get your attention, a quick half-second assessment before you escalate can prevent an unnecessary and legally messy confrontation. That said, don’t linger there if your gut says otherwise, trust the discomfort and act.
Throughout any of these responses, keep breathing. A tucked chin and tensed neck muscles protect your airway, but holding your breath slows your reaction time exactly when you need it fastest.
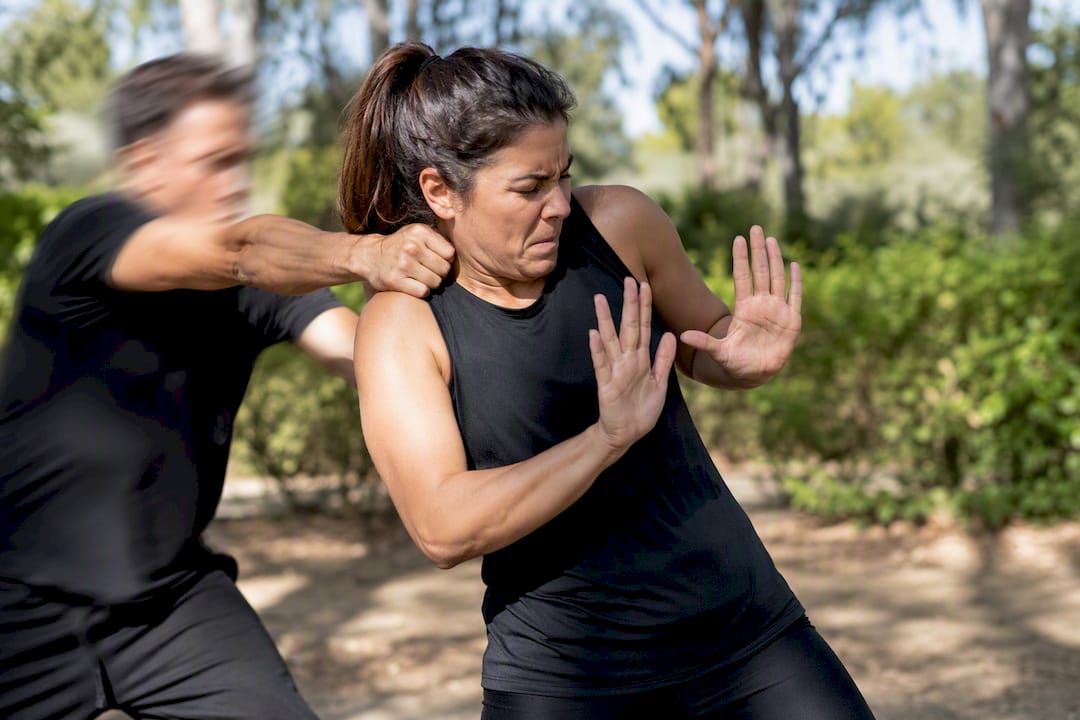
Pro Tip: Practice the chin tuck and hand-to-neck reflex on its own, separate from any strike. It should become as automatic as flinching.
How Do You Escape If You’re Lifted or Being Carried?
Being lifted off the ground is the most dangerous version of a rear grab because it signals an attempt to move you somewhere else, a parked car, a secluded area, a worse position. Your priority shifts immediately from breaking the grip to stopping the movement.
Drop your hips hard and widen your stance the instant you feel your feet leave the ground, this fights the lift and forces the attacker to work harder.
Hook one of your legs behind the attacker’s leg or thigh. This traps their base and turns your body into dead weight they can’t easily reposition or step out with.
While hooking, drive elbow strikes backward or throw a groin strike with whatever limb is free, the goal is to make holding you as physically costly as possible.
If you’re taken to the ground, tuck your chin to your chest, roll onto a shoulder rather than your back, and keep your arms in to protect your head and ribs on impact.
Once you regain your feet or create separation, get up immediately and move to safety rather than continuing to grapple.
Staying on your feet is almost always the better outcome if you can manage it, ground fighting favors whoever has more training, and you rarely know that about a stranger. But if you’re taken down anyway, a controlled roll beats a rigid fall every time; a body that resists the ground absorbs far more impact than one that rolls with it.
Pro Tip: The leg hook works because it removes the attacker’s ability to reposition their feet. Without stable footing, most people cannot maintain a lift for more than a second or two.
What Should You Do Immediately After You Break Free?
The moment the grip breaks, your job isn’t finished, it’s just entered its next phase. Run toward people, light, or a locked door, not away into isolation. Shout for help using specific, actionable language rather than a generic scream.
Get to bystanders or call 911 as soon as you’re physically clear of the attacker.
Check yourself for injuries, especially to the head, neck, and abdomen, these can hide serious damage behind adrenaline.
Photograph visible injuries and torn clothing once you’re safe, this documentation matters if you report the incident.
Report what happened to police, even if you feel uncertain about whether it “counts.”
Community and martial arts guidance is consistent on one point: avoid escalating force beyond what’s needed to escape, and prioritize getting away over continuing to fight once space is created.
Self-defense laws around proportional force vary by state and situation, so treat any specific legal question as one to raise with a local attorney or law enforcement, not something to guess at in the moment. If the incident involved a partner, family member, or someone in your household, resources on recognizing patterns of abuse can help you process what happened and plan next steps beyond the physical encounter.
How Can You Practice These Escapes Safely?
Reading these steps builds awareness. Drilling them builds reflex, and only reflex holds up when adrenaline hits. A short, structured routine gets you there faster than sporadic practice.
Start with a 10 to 15 minute partner warm-up: slow, deliberate rear grabs where your partner applies light pressure and you walk through the full sequence without speed.
Repeat each escape, bear hug, waist grab, shoulder grab, at least ten times slowly before adding any resistance.
Add progressive resistance gradually, your partner grips slightly harder each round, but never past a controlled, safe level.
Introduce a clear stop signal, a tap or a spoken word, before every session, and stop instantly when either partner uses it.
Always use protective gear for strikes aimed at sensitive areas, and never practice full-force groin or eye strikes on a partner.
Solo rehearsal matters too. Shadow-practicing the drop-turn-strike sequence, even without a partner, reinforces the motor pattern your body needs.
None of this replaces supervised instruction. A trained instructor spots the small errors, a grip that’s slightly off, a pivot that leaves you exposed, that you can’t catch on your own, and applies realistic pressure testing you can’t safely replicate alone. CVPSD’s reality-based self-protection workshops are built around exactly this kind of supervised, progressive practice, with corrections and pressure testing that solo drilling simply can’t offer.
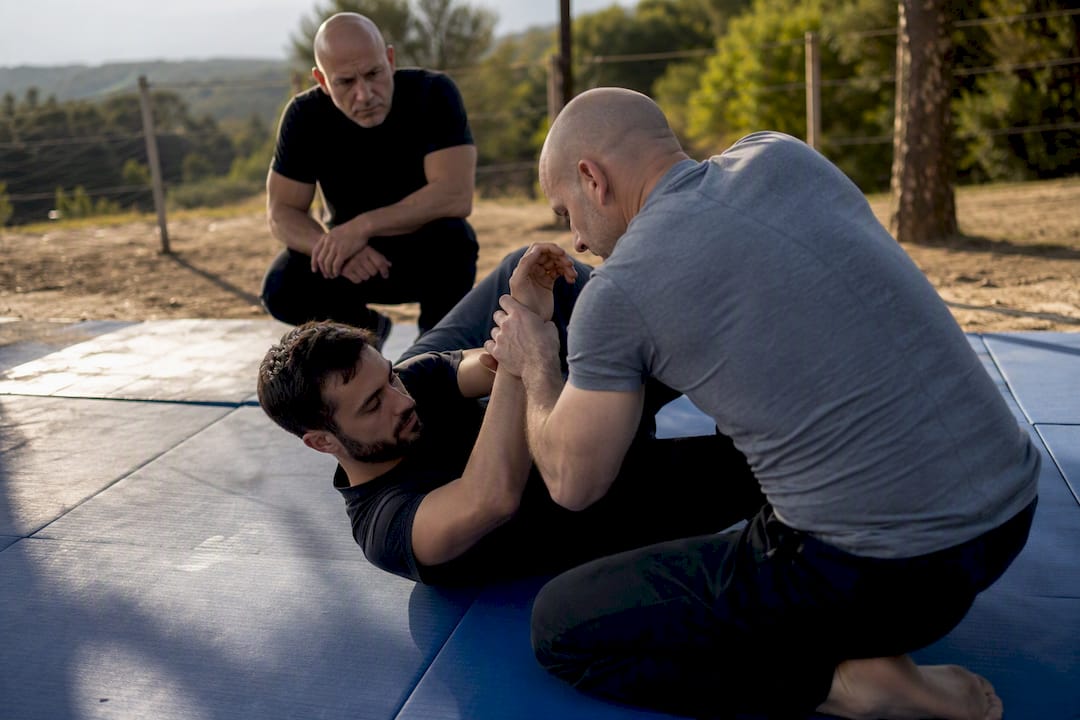
Pro Tip: If a technique feels awkward after ten slow repetitions, don’t push speed yet. Awkward at slow speed becomes dangerous at full speed.
What the Conventional Advice on Rear Grabs Gets Wrong
Most self-defense content treats a rear grab like a single problem with a single answer, remember this one move and you’re covered. That’s backward. The research behind this guide points to a different truth: a bear hug with your arms trapped and a bear hug with your arms free require different first moves, and treating them the same wastes the exact seconds you can’t afford to lose.
The bigger blind spot is confidence. Plenty of guides hand readers a technique and imply it works every time. It doesn’t. Pain-compliance moves depend on an attacker who registers pain normally, adrenaline, substances, or sheer aggression can blunt that. The honest position is that these techniques improve your odds significantly, they don’t guarantee an outcome.
What matters most, then, isn’t memorizing five techniques. It’s drilling two or three until the drop-turn-strike pattern fires without thought, and pairing that with real, supervised practice where someone can correct your form under actual pressure. Reading solves awareness. Only repetition solves reflex.
Get Hands-On Rear-Grab Training With CVPSD
Reading about these escapes gets you halfway there. The other half comes from someone correcting your grip angle, your timing, your footwork, in real time, under realistic pressure. CVPSD’s in-person and online seminars close that gap with instructor-led sessions built specifically around scenarios like rear grabs, bear hugs, and grappling defense, not generic self-defense theory.

CVPSD’s programs are shaped for real people, not martial artists: employees, students, community members, and organizations that want their teams to walk away with skills that hold up under stress, not just in a classroom. Every session is built on evidence-based crisis intervention and physical self-defense training, and CVPSD’s work with agencies like the Defense Logistics Agency and Washington DC’s Pretrial Services staff reflects the same rigor applied to individual and community classes.
If you want the drills in this guide to become second nature, book a CVPSD training session or reach out about scheduling a workshop for your organization or community group today.
Sources
FAQ
How Do You Defend Yourself If Grabbed From Behind?
Drop your weight to lower your center of gravity, rotate into the grab to break the attacker’s structure, then clear the grip using wrist leverage before moving to safety. The exact sequence shifts slightly depending on whether it’s a bear hug, waist grab, or shoulder grab.
What Should You Do If Someone Grabs Your Shoulder From Behind?
Tuck your chin, bring your hands up to protect your neck, and lower your base immediately. From there, either trap the attacker’s wrist and pivot to face them, or use a shock strike like a foot stomp to create space and disengage.
What Are the Four D’s of Self-Defense?
Self-defense frameworks vary by program, and there isn’t one universally agreed definition of “the four D’s.” The consistent principles across reputable training, including CVPSD’s approach, are awareness, avoidance, de-escalation, and decisive action when escape isn’t possible.
How Do You Defend Against a Grab in General?
Focus on breaking the attacker’s balance rather than matching their strength: drop your weight, change the angle through rotation, and target leverage points like the wrist or thumb to release the grip. Practicing this pattern with a partner, under safe and supervised conditions, is what turns it into a reliable response.
Is It Better to Fight or Run When Grabbed From Behind?
Running is almost always the better outcome once you’ve created enough space to do so safely. Reserve strikes for the moment you need to generate that space, not as a substitute for getting away.
Recommended


